Introduction to Double Exposure Background Photography
Double exposure photography is a captivating and creative technique that involves combining two or more images to create a single, surreal composition. This method has its roots in film photography, where photographers would expose the same frame of film multiple times to achieve the desired effect. With the advent of digital photography, the creative possibilities have expanded exponentially, allowing for more precise control and experimentation.
Historically, double exposure was a challenging process, requiring meticulous planning and execution. However, digital tools have democratized this art form, making it accessible to both amateur and professional photographers. By blending different images, photographers can produce a range of effects—from dreamlike landscapes to poignant portraits—that evoke emotion and tell a story.
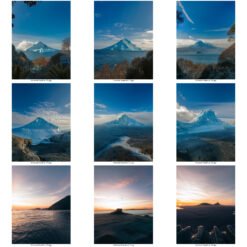
The essence of double exposure lies in its composition. Combining images requires a thoughtful approach to ensure that the final result is harmonious and visually appealing. Key elements such as light, shadow, and texture play a significant role in determining how the images will blend together. For instance, a silhouette against a bright sky can serve as a perfect canvas for overlaying a detailed texture or secondary image.
Creatively, double exposure techniques open up a world of possibilities. Photographers can experiment with various themes, such as juxtaposing urban and natural environments, or blending human forms with abstract patterns. The technique encourages out-of-the-box thinking, pushing the boundaries of conventional photography.
Understanding the foundational principles of double exposure is crucial for anyone looking to explore this artistic medium. Whether using traditional film cameras or modern digital software, mastering the basics will allow photographers to unlock their full creative potential. As we delve deeper into the specifics of creating stunning double exposure backgrounds with 18×24 size prints, this foundational knowledge will serve as a valuable guide.
Choosing the Right Images for Double Exposure
Creating stunning double exposure backgrounds with 18×24 size prints requires a careful selection of images that harmonize to produce a compelling visual effect. The key to achieving this is understanding the importance of contrast, texture, and subject matter in your image choices.
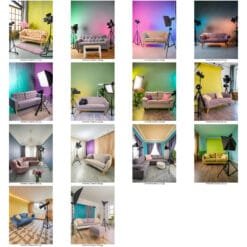
Firstly, contrast is essential. Selecting a base image with a good balance of light and dark areas can significantly enhance the double exposure effect. For instance, a portrait with distinct highlights and shadows can serve as an excellent base. The contrast in the base image allows the overlay image to blend seamlessly, creating a striking composite.
Texture also plays a crucial role in the double exposure technique. The texture of the base image should complement the overlay image rather than clash with it. For example, pairing a portrait with smooth skin tones with an overlay image featuring intricate patterns or natural textures like trees or clouds can create a harmonious blend that draws the viewer in.
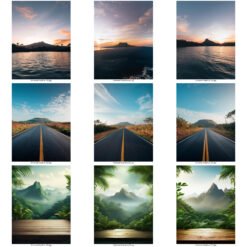
When it comes to subject matter, the choice of images should tell a cohesive story or evoke a specific emotion. A common approach is to use portraits as base images and overlay them with landscapes, cityscapes, or abstract patterns. This combination can produce a visually captivating result, as the human element in the portrait adds a personal touch, while the overlay image provides context and depth.
Visualizing the final composition before starting the double exposure process is crucial. Consider how the elements of each image will interact. Will the overlay image enhance the subject’s features in the base image, or will it distract from them? Experimenting with different combinations and visualizing the outcome can lead to more informed choices and ultimately, more stunning double exposure backgrounds.
Finally, the impact of different image combinations cannot be underestimated. Sometimes, unexpected pairings can yield the most intriguing results. By paying attention to contrast, texture, and subject matter, and by carefully visualizing the final composition, you can create double exposure backgrounds that are not only visually pleasing but also rich in narrative and depth.
Techniques for Creating Double Exposure Backgrounds
Creating double exposure backgrounds can be an incredibly rewarding process, blending two or more images to produce a captivating and ethereal effect. Whether you’re using a camera or post-processing software like Photoshop, mastering the right techniques is key to achieving stunning results, especially when working with 18×24 size prints.
In-Camera Techniques
For photographers who prefer in-camera double exposure, understanding your camera’s settings is crucial. Most modern DSLRs and mirrorless cameras have a built-in multiple exposure mode. Begin by selecting this mode and choosing your base image—typically a silhouette or a strong, singular subject works best. Next, capture your overlay image, ensuring it complements the first in terms of composition and lighting. Experiment with different combinations, such as landscapes over portraits, to see what resonates most with your artistic vision.
Post-Processing Techniques
Post-processing offers greater control and flexibility for creating double exposure backgrounds. Start by opening your base image in Photoshop, then import the second image as a new layer. Adjust the opacity of the top layer to allow the base image to show through. Utilize blending modes like ‘Screen’ or ‘Overlay’ to merge the images seamlessly. Fine-tune the effect by using layer masks to selectively hide or reveal parts of each image, creating a more cohesive blend.
Enhancing the Double Exposure Effect
To elevate your double exposure backgrounds, consider using filters and adjustment layers. Tools like the Gradient Map can add dramatic color shifts, while the Curves adjustment can enhance contrast and depth. Applying Gaussian Blur to one of the layers can introduce a dreamlike quality, making the final print more visually compelling. Real-world examples from professional photographers often showcase how subtle color grading and meticulous layer adjustments can transform a good double exposure into a stunning masterpiece.
Common Pitfalls and Best Practices
One common pitfall when creating double exposures is overcomplicating the composition. Keep it simple by choosing images that naturally complement each other. Also, pay attention to lighting; images with similar lighting conditions blend more seamlessly. Professional photographers often emphasize the importance of practice and experimentation—don’t hesitate to try different techniques and tools until you find what works best for your 18×24 size prints.
Printing and Displaying Double Exposure Art on 18×24 Size Prints
Creating a stunning double exposure artwork is only half the journey; the other half involves printing and displaying it effectively. When working with 18×24 size prints, selecting the right type of paper is crucial to retaining image quality and color fidelity. High-quality photo paper, such as glossy or satin finishes, can enhance the vibrancy and depth of the double exposure effect. For a more artistic touch, fine art papers like matte or textured finishes can add a unique tactile element to the print.
Printing techniques also play a pivotal role in the final presentation. Giclée printing, known for its exceptional detail and color accuracy, is highly recommended for double exposure artworks. This method utilizes archival quality inks and advanced printers to ensure longevity and resistance to fading. Alternatively, dye-sublimation printing can offer vibrant colors and is particularly useful for prints on metal or canvas, providing a modern and sleek look.
Once printed, the presentation of your double exposure art is paramount. Framing options can significantly enhance the visual appeal of your 18×24 prints. A minimalist frame can keep the focus on the artwork, while ornate frames can add a touch of elegance. Consider using a mat board to create a border around the print, which can help to draw the viewer’s eye toward the image. For a contemporary aesthetic, frameless options like acrylic or metal prints can offer a clean and bold display.
Deciding where to hang your double exposure art is equally important. Choose a location with good natural light, but avoid direct sunlight to prevent fading. For optimal impact, position the artwork at eye level and use accent lighting, such as picture lights or adjustable spotlights, to highlight the details and colors. Hallways, living rooms, and office spaces are ideal locations to showcase your prints, turning them into focal points that captivate viewers.
By carefully considering the paper type, printing techniques, framing options, and display settings, you can ensure that your 18×24 double exposure prints are presented in the best possible way, allowing the intricate artistry to shine through.
PRODUCT DETAILS:
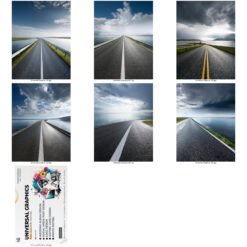
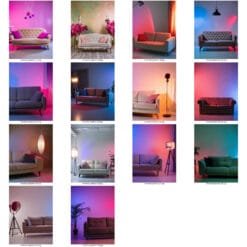
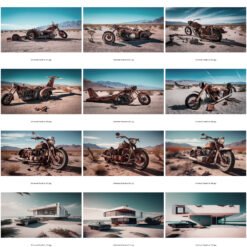
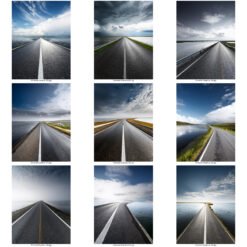
- Templates Type: 18×24 JPG Background
- Resolution: 4k High Quality
- File Format: JPG
- Use In: Background (Copyright Free)
WHAT YOU’LL GET:
- 50+ JPG
- 1 ZIP FILE
- 440 MB FILE SIZE
- 18×24 JPG 300 PIX


")
")
")
")


 Double Exposure Backgrounds | ...

Reviews
There are no reviews yet.